Workspace
The workspace mode is where you create dataflows to generate drafts. You create dataflows by adding drafts and operations to the workspace and chaining them together into draft generating workflows.
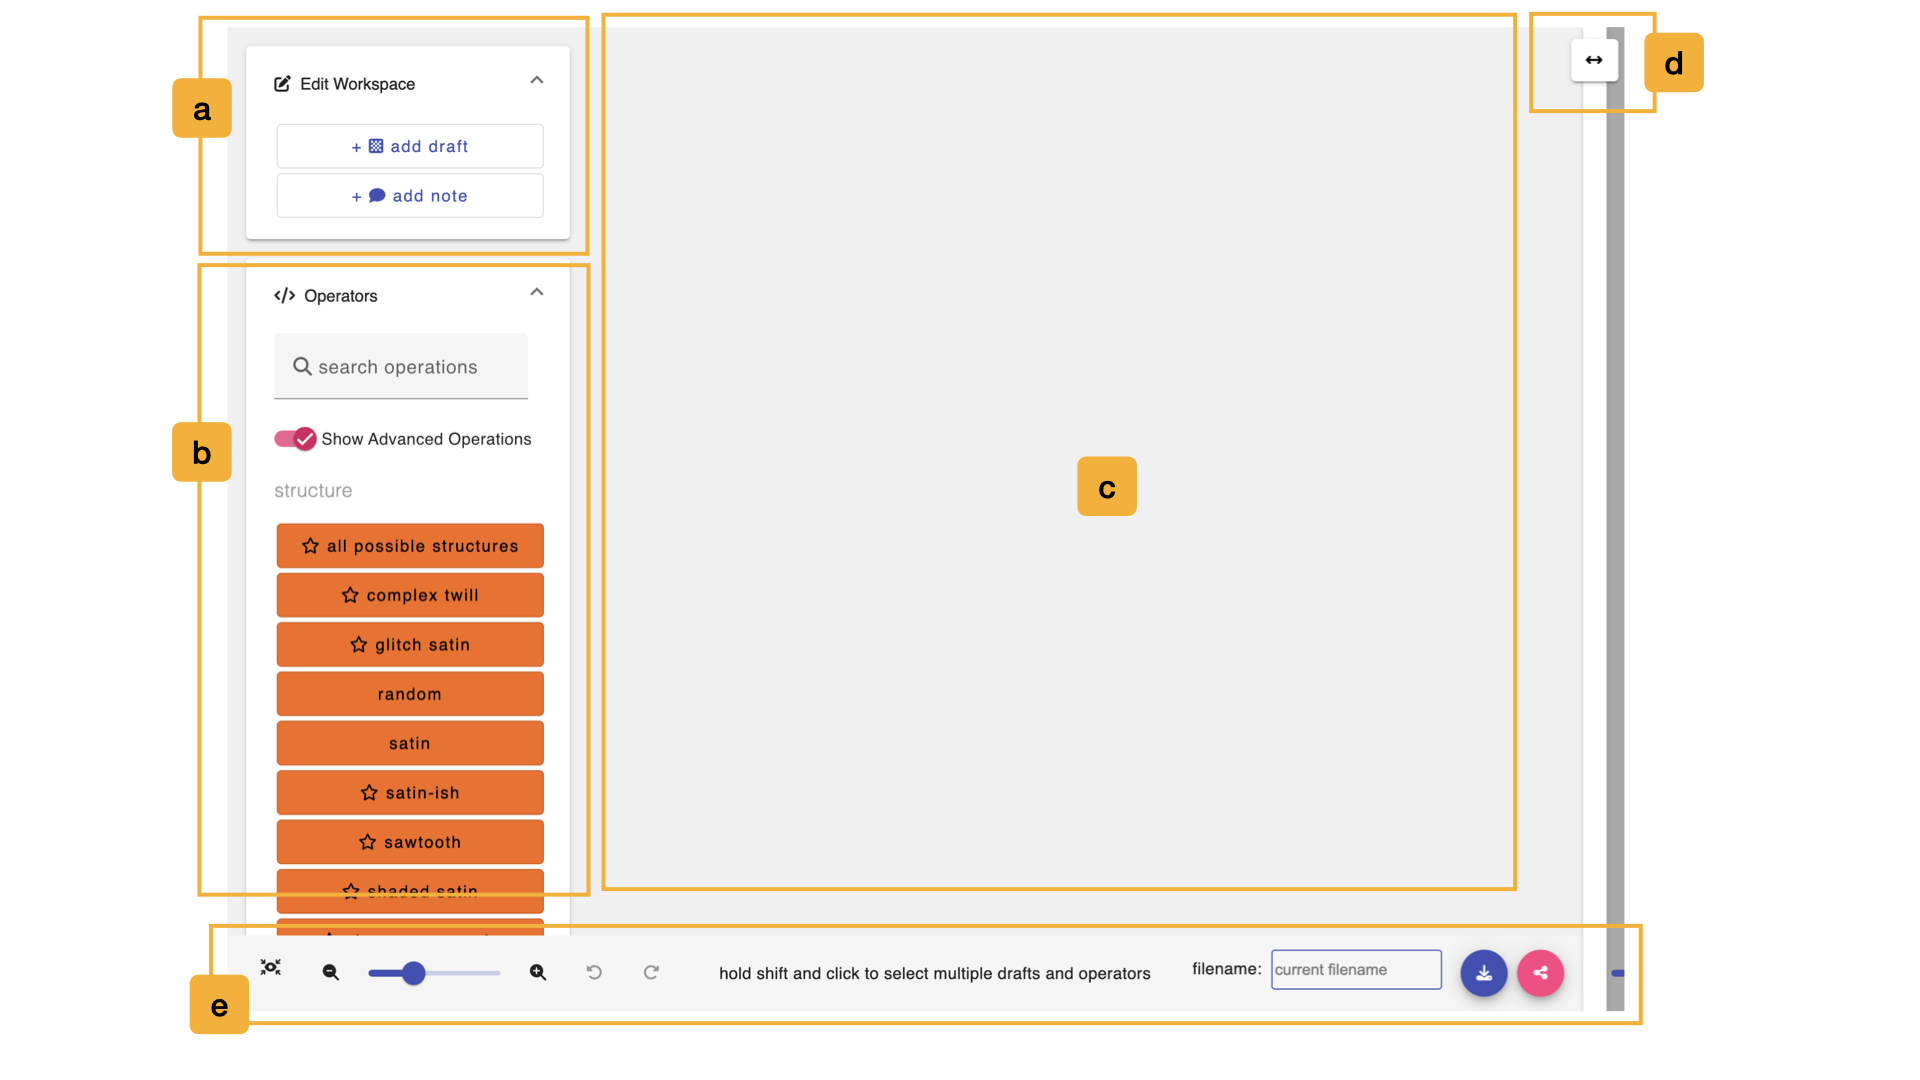
a. Add Drafts or Notes to Workspace
The buttons in this window let you add new kinds of nodes to your dataflow workspace. Specifically, you can add drafts or notes.
- + add draft, will open a window to ask for you to the number of warps and wefts and then will add a blank draft of those dimensions to workspace.
- + add note, it will automatically add a note onto the workspace. You can use this note to jot down any additional text information about your workspace.
b. Add Operations to Workspace
This side panel allows you to search through and add operations to your workspace. By default, it only shows basic operations. To see all operations, you must enable the "Show Advanced Operations" toggle.
- type in the name of the operation you are looking for into this search box. As you type, the operations below will only include those that match your search.
- the show advanced operations toggle is used to show or hide operations that we consider to be advanced. We use it to reduce clutter for new users but once you get a hang of things, flip this toggle to show and explore all the operations AdaCAD has to offer.
- The rest of the window is devoted to showing one button for each operation that AdaCAD supports. Clicking on any of the operations in this list adds it to your workspace. Operations are grouped and color-coded based on how they tend to be used in the drafting process. You can explore these groupings and all the operations we currently offer by clicking Reference->Operations(A-Z) in the left sidebar of this page.
c. Dataflow Workspace
This area is used to create your dataflows. You can do this by adding drafts and operations using the interface buttons listed above and then "connecting" them together by connecting the outlet of one operation or draft node to the inlet of an operation.
To create a connection, start by clicking the outlet of one node (node a - twill in the example below) to the inlet of another (node b - tile in the example below). This action tells AdaCAD to take the draft created node a and use it as an input to the operation at node b. Node b then runs the operation, and manipulates the draft in accordance with that operations specific code and user-defined parameters.
Video
We also offer this video overview of the process of making dataflows:
Key Commands
- click on any draft to open it in the viewer.
- hold the shift key + click any operation or draft to multi-select.
- multi-selected nodes can be moved as one or copy/pasted using
command+candcommand+v
- multi-selected nodes can be moved as one or copy/pasted using
- double click on any draft to open a menu of possible actions to take on that draft (e.g. open in editor, download, delete, etc. ).
- use track pad or mouse-wheel to scroll the workspace left and right, up and down.
d. Resize Window
You can press this button and drag to the left or right to expand/contract the amount of the screen that is devoted to the workspace.
e. Adjust View, Save and Share
The footer in this section is devoted to managing the state of the workspace. The left-most set of controls allow you to zoom in and out of the workspace.
-
Fit to Window: This button will automatically resize and scroll the view so that your entire dataflow is visible within the workspace window. If you have selected or multi-selected drafts and operations, this will fit the view to your selection.
-
Zoom Out: This button will zoom out from the top left corner of the view. You can also do this by pressing
command+-key -
Zoom Slider: Reflects the current level of zoom and can be moved freely to zoom in and out
-
Zoom In: This button will zoom in from the top left corner of the view. You can also do this by pressing
command++
Next, we encounter the buttons that control the state of our design:
- Undo: AdaCAD stores your last 10 edits. If you want to move back to a previous edit, use this "undo" button. You can also do this by pressing
command+z - Redo: If you want to move forward to an edit that you had previously un-done, use this "redo" button.
In the center of the footer, we'll occasionally add tips and tricks to try.
To the right, we have options for naming and downloading or sharing the workspace.
- the filename text box allows you to give this workspace a name. This is the name that will be used to label the workspace if you download it (e.g. your_name.ada) or if you choose to save it on your AdaCAD account.
- Download: click this to download the workspace as a .ada file. Additionally, if you have a draft selected on the workspace, you can choose to download that draft as a .WIF, bitmap or image file.
- Share: Click this button to create a link to your workspace. Anyone who visits that link will get to open and edit your workspace.